
Every crypto-lover knows that NFTs can be a great form of investment with considerable returns. And despite the recent slump of the crypto market, NFTs are still a popular asset to invest in.
When we first think about buying an NFT, the first thing that comes to mind might be the million-dollar art and big projects that have seen success in recent years. However, NFTs must not always be a bank-breaking asset to invest in. In fact, many NFT projects today started with extremely affordable unit prices before their popularity made their prices go up.
Before we get right into the mix, if you’re not sure what an NFT is or what you should do with one, we have a comprehensive guide for you right here.
In this article, we will be focusing on OpenSea because it is the longest-serving and most used NFT marketplace at the moment.
Top 5 NFT MarketPlaces
If you’re new to the NFT space, you might not know how to buy and sell NFT on OpenSea. We will guide you through the necessary processes when buying NFTs on OpenSea.
When purchasing your first NFT on OpenSea, you will need to follow this 5-step guide we will be breaking down right now. Let’s get started.
Install MetaMask
The first thing a newbie needs to have is a crypto wallet. There’s not much you can do in the crypto-verse without one and since NFTs are hosted on the blockchain, they follow the same trajectory.
We recommend the use of MetaMask for two major reasons. First, it is arguably the most popular crypto wallet for NFTs. Secondly, it has a very responsive web extension that works well with OpenSea.
The first screenshot shows the MetaMask homepage and an option to install the chrome extension (in the yellow square). This will vary based on the browser and PC you use.
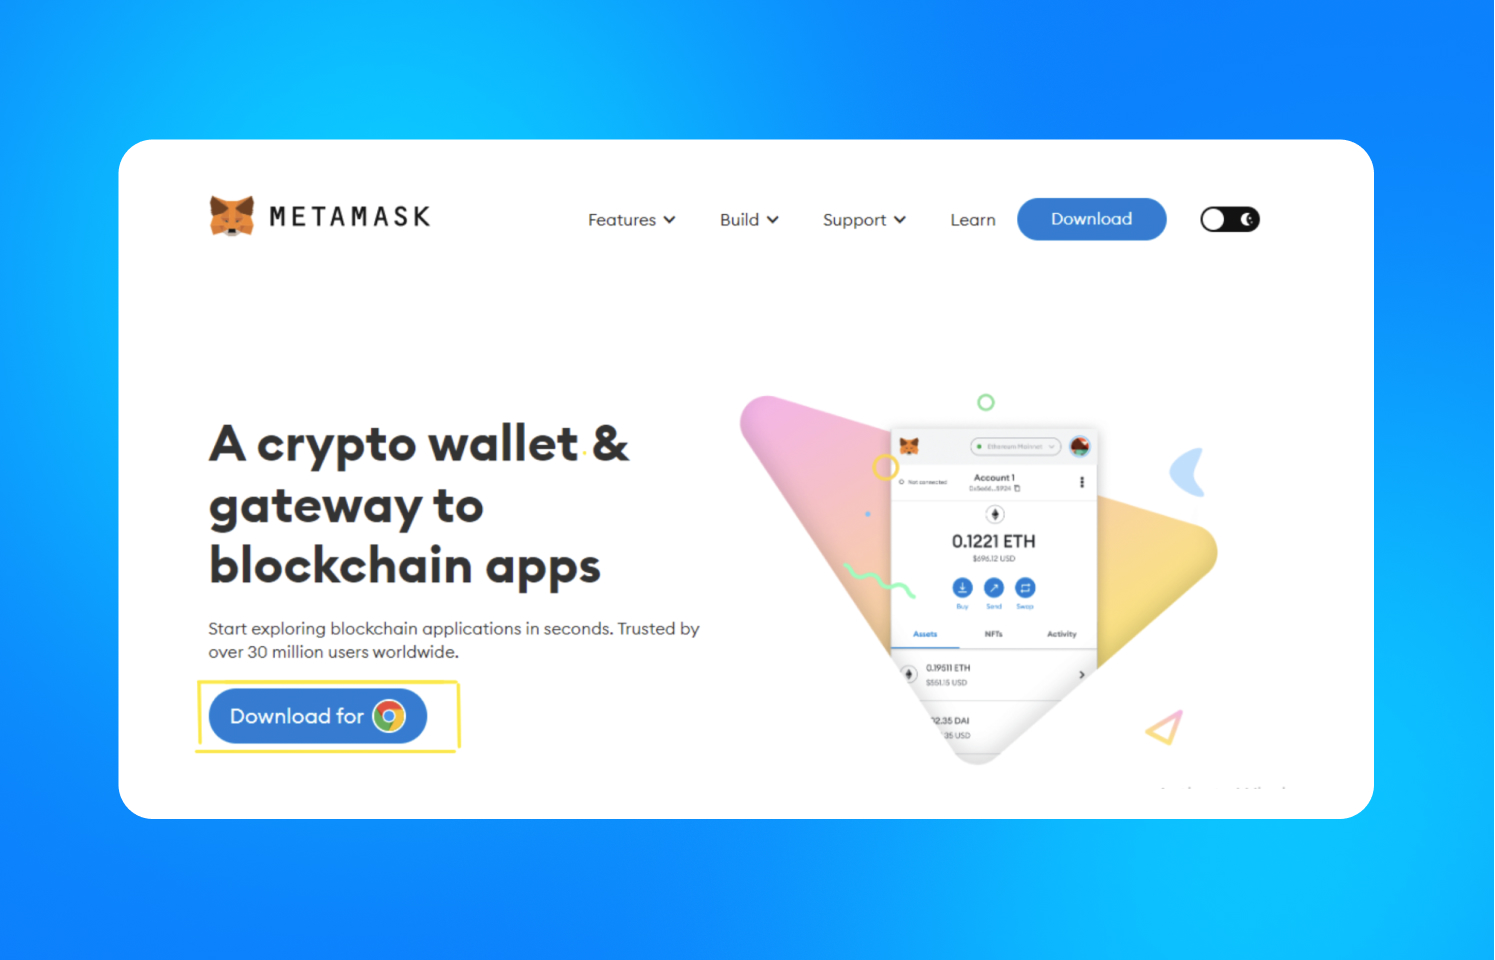
You will then be taken to the chrome web store, where you’ll install the extension.

After downloading the extension, it will launch automatically to open a Signup page. Next will be a “Data policy” page that gives MetaMask the right to use your data with your permission. You can choose to agree or disagree. Note that this choice would affect your overall user experience with the application.

Next is the “Create password” prompt where you come up with a password for your wallet. Note that MetaMask cannot recover passwords for you as a result of the decentralized system it is built on.
Instead, there is a 12-word recovery phrase system that will come up after you create your password.

Next an explanatory video on securing your wallets and all you need to know about the 12-word recovery phrase we talked about.

We recommend you click the “secure my wallet” option and secure the wallet with a recovery phrase immediately. You’ll see this screen next. Copy the recovery phrase and keep it in a safe place. It could be in your diary, a journal, or even in a safe lock.
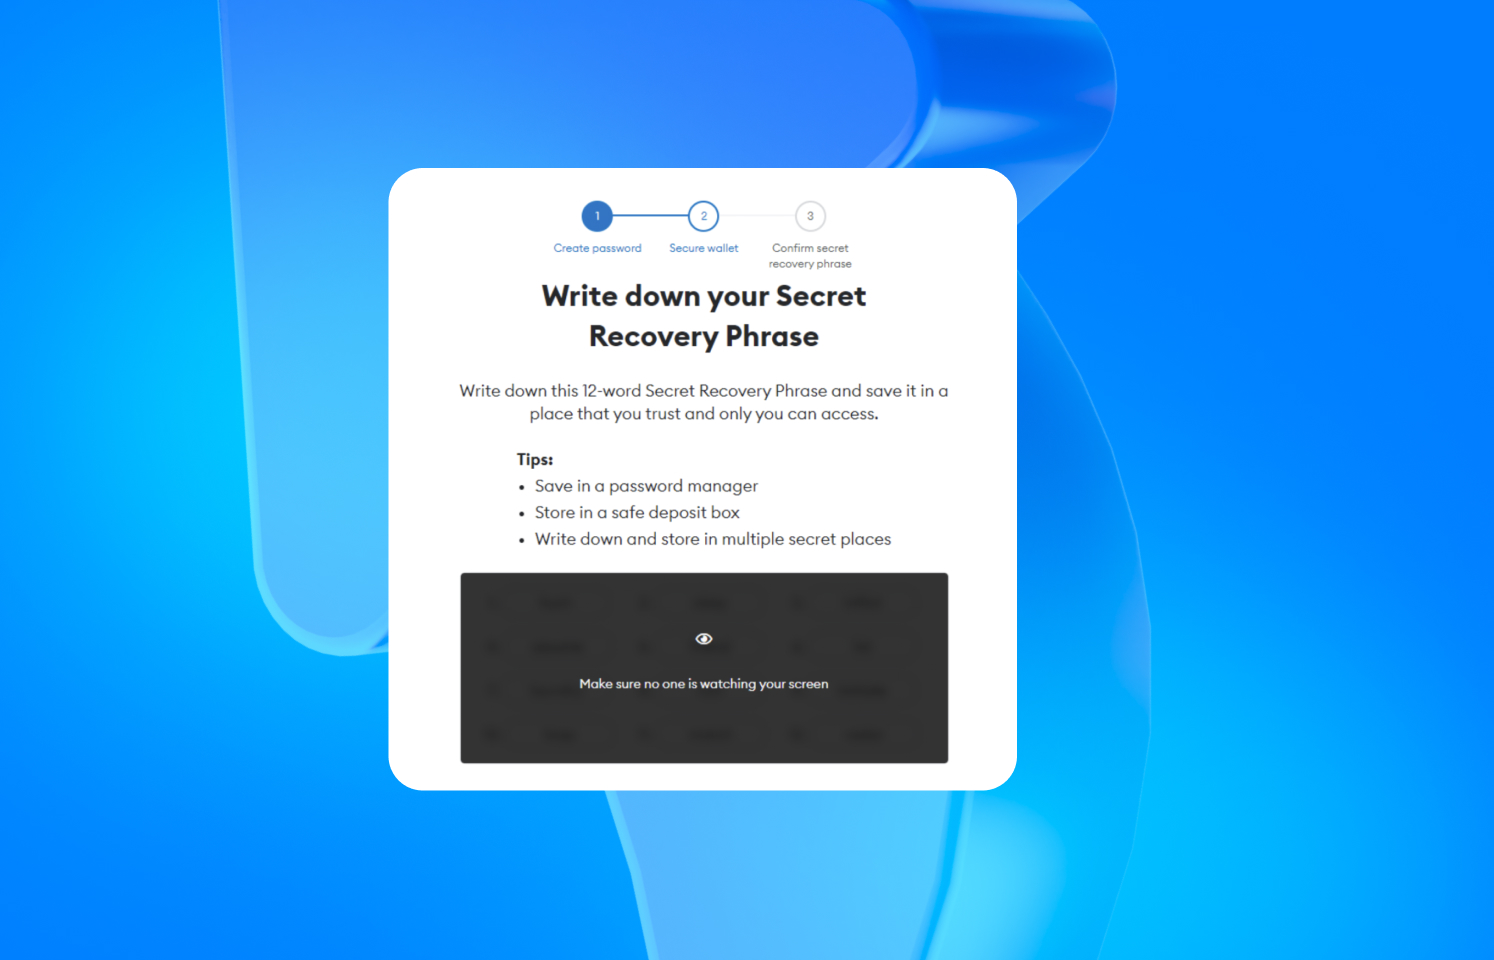
Finally, before you access your Metamask account, you’ll be asked to confirm the secret recovery phrase you were given.

After successfully confirming your secret phrase, you’d have successfully created a MetaMask wallet.

Link Your MetaMask Account to OpenSea
Now that you have a wallet, the next major step is to link your MetaMask account to an OpenSea profile.
This step is somewhat easier than the first step, which involved creating the MetaMask account. Here’s how you can go about it.
First, search for OpenSea on your browser or follow this link to get to the OpenSea home page. OpenSea’s page might look something like this:

Next click on the user icon in the top right corner of the screen, and select “Profile” from the resulting drop-down menu.

Next will be a pop-up prompt displaying the available options for connecting wallets. MetaMask is usually tagged “popular.” Choose MetaMask.
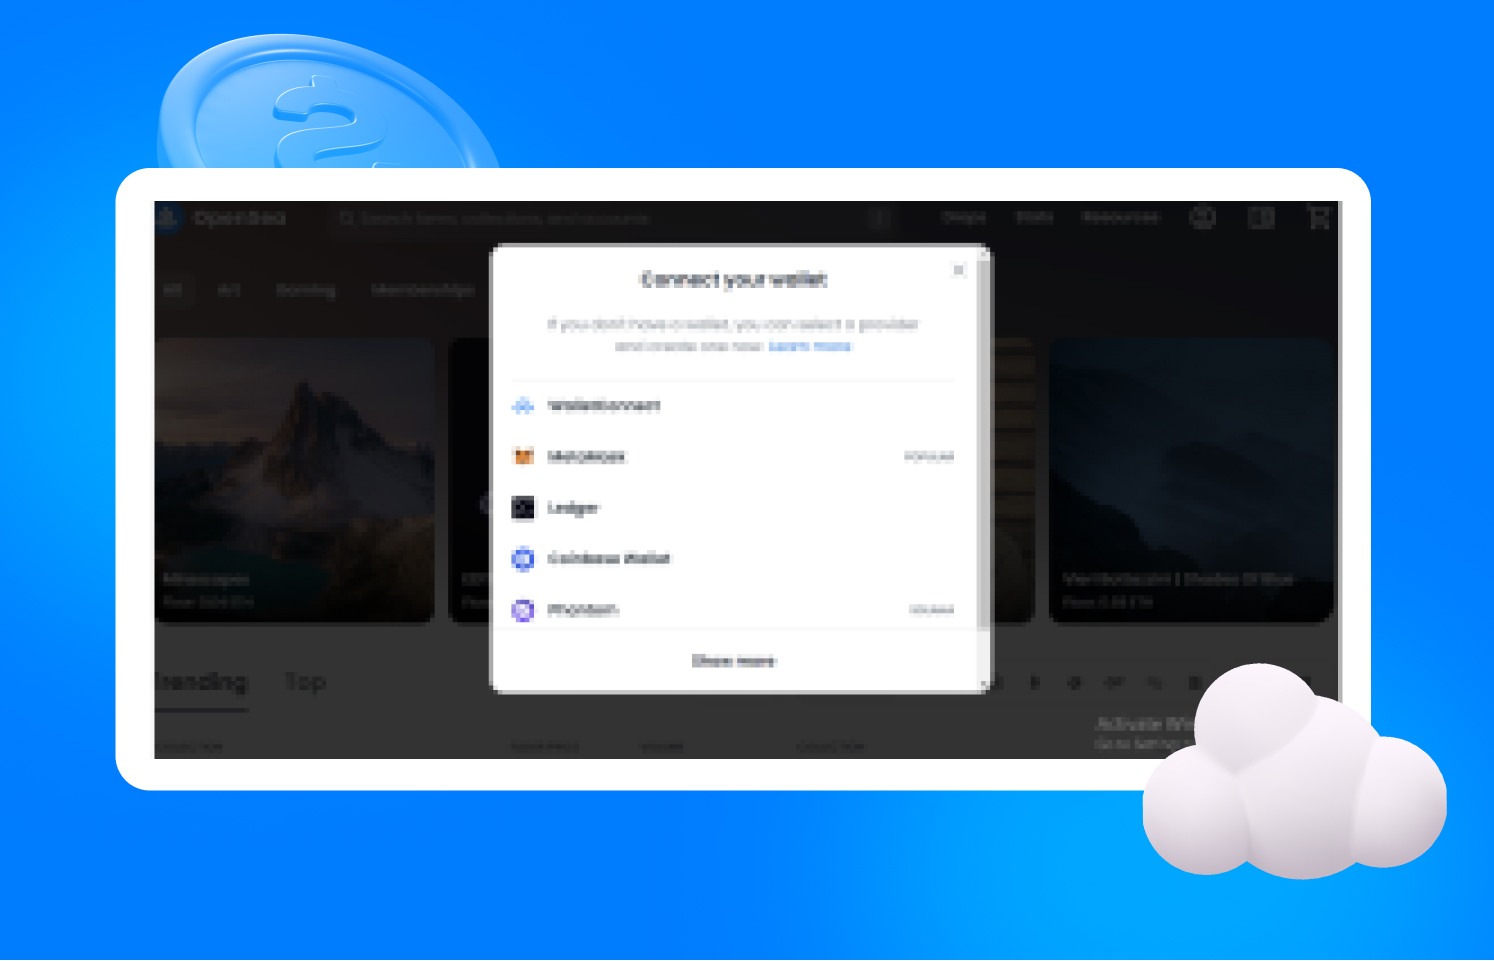
Follow all the prompts and connect your wallet. If the website takes you to the MetaMask homepage again and asks you to download the extension, it is an error and you have to connect manually.
Here’s how to manually connect your MetaMask wallet to OpenSea if you want to purchase NFTs on OpenSea:
On OpenSea;s homepage, click on the MetaMask extension icon at the top right-hand corner of your browser. A prompt will pop up by the side with various options. Click on the three-dot ellipsis menu and select “connected sites”.

This option will show all your connected sites (if any) and an option to manually connect the current site you're on(OpenSea).

The dialog box will display your available choices of wallet addresses. If you have just one account (like in these screenshot examples), it will be automatically selected.


Once you have accepted and clicked on “connect,” you will redirected to the “home dialog” of the MetaMask extension. This time, however, there would be an area tagged “connected” with a green dot as shown below.

Congratulations, you have now successfully connected your MetaMask wallet to your OpenSea profile.
Purchase Ethereum
The next thing on the list is buying Ethereum. Ethereum is the blockchain on which most NFT projects are housed which is why we are choosing to focus on it in this article.
However, some NFT projects could use other cryptocurrencies such as Solana, Tron, PolkaDot, Flow, etcetera to transact.
Buying Ethereum doesn’t require any long and tedious process, It is going to be a lot easier since we now have the MetaMask extension installed. Here’s what you should do.
Click on the MetaMask icon on the top right-hand corner of your browser (just like we did when connecting OpenSea manually).
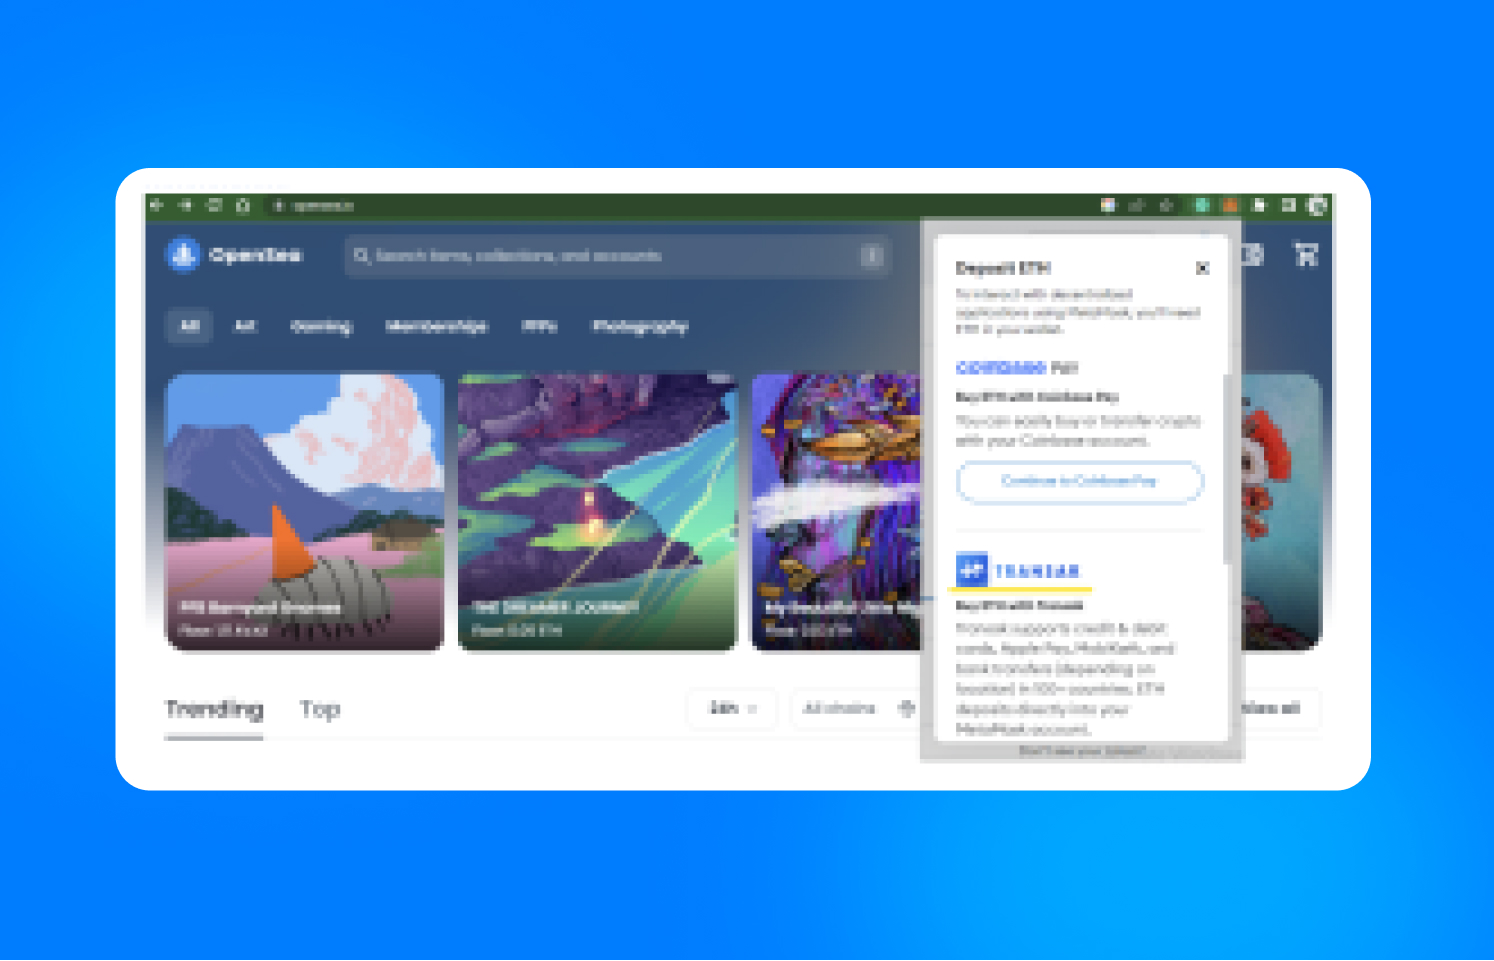
Next click on the buy button, underlined in yellow in the screenshot below.
There are a few options for buying Ethereum, we recommend Transak, but if you have a Coinbase wallet, already, you can choose to transfer Ethereum to your MetaMask wallet from there.
You’ll be taken to the Transak homepage to complete your transaction to buy ETH. There are options for instant transfer, Visa, Google pay, and Apple pay. You can choose any that suits you.

Browse and Purchase
At this point, you’re more or less set to go. All you need to do is browse through OpenSea, make your selection, and complete your purchase, and voila you might be set for a profitable investment in the NFT revolution.

Buying NFTs on OpenSea is an easy process that you can perform with your PC or even your mobile device. You can choose to ask for advice or go through several NFT guides on Gotbit.io.


